
UzstādīšanaPakāpiens
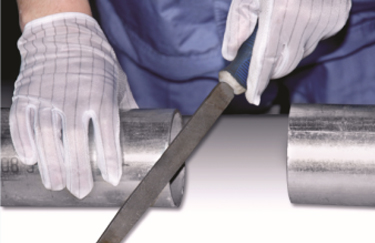
Attēlot un noņemiet pelnus, putekļus un dažādus, saglabājiet divus cauruļu galus, kas sagriezti virsmā gludi.
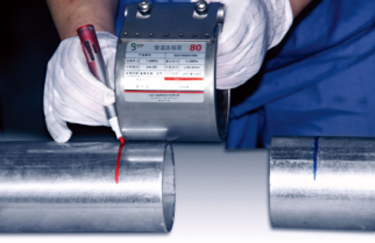
Atrodiet montāžas līniju un atzīmējiet ievietošanas savienotāja atrašanās vietu.
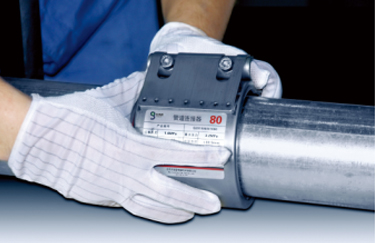
Vispirms ielieciet savienojumu uz Marka pozīcijas un saglabājiet to.

Ielieciet otru cauruli savienojumā un pārliecinieties, ka atraities marķējuma stāvoklī.
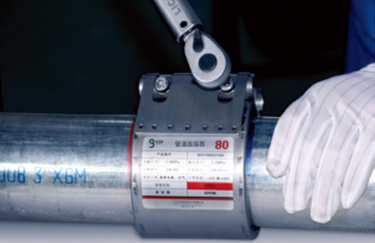
Tiešs abas skrūves pārmaiņus ar norādīto griezes momentu uzgriežņu atslēgu
Pabeigts
UzstādīšanaRādītājs
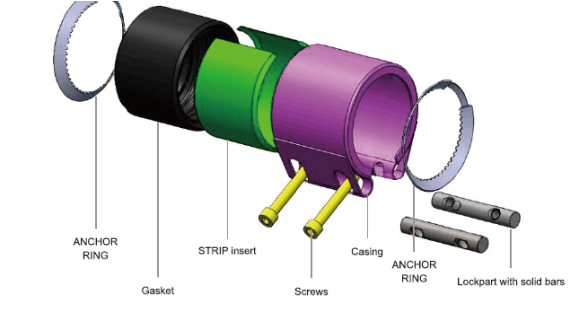
Nenometiet savienojumu
● Saglabājiet sakabi tīru- atstājiet to iesaiņojumā, līdz esat gatavs to izmantot
● Nelietojiet demontēt savienojumu
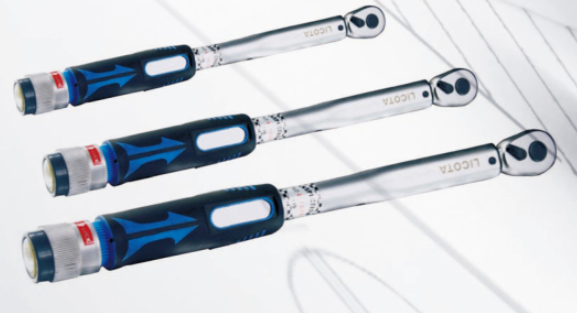
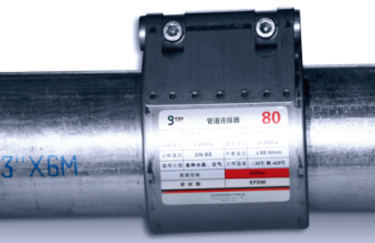
Griezes momenta uzgriežņu atslēga
Lai nodrošinātu veiksmīgu izmantošanu, instalējot, jāizmanto griezes momenta uzgriežņu atslēga. Please select proper wrench for each types as indicated on the label. The coupling do not require any maintenance and must not be tightened once the torque has been reached. We recommend you mark the coupling once the screws have been torqued up. This will ensure that you and others know that the screws have been tightened. If you are unsure as to whether the screws have already been tightened, loosen the screws completely and repeat the installation from scratch.